
What you'll need:
Fabric (I got 6 yards for 6 stools just in case I had a mess up along the way.)
Stapler gun
Seat Cushion
**Below are steps for a super quick re-upholster job! Being that the stool cushions were in such good shape I didn't need to add padding to the cushion, nor did I need to take off the original fabric since it was so flat against the seat.
Step 1: Take cushion off seat by removing all nails so that it's completely off bar stool.

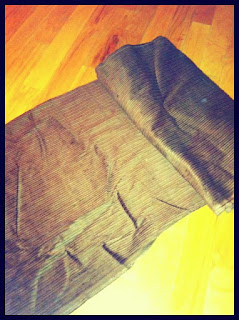
Step 2: Choose your fabric.
In this instance I chose a chocolate brown corduroy. I love the look of it in the room with the new design! It will also clean easy and won't show stains from food, or alcohol (especially wine! :) )
Step 3: Layout your stool cushion on the fabric- FACE DOWN.
This helps with seeing how much fabric you really need to cover the cushion BEFORE cutting it. This also allows you not to waste any fabric in case you need it down the line..

This is too much fabric...

And this is way too much fabric...

Step 4: Once you've gotten the accurate amount of fabric needed for the cushion, Roll the fabric to the back of the cushion really tight, and use the staple gun to hold fabric down into place.

EXTRA UPHOLSTERY TIP:
If you want the perfect corner on your seats do the following...
Cut the corners of the fabric in slits

Layer the slits on top of each other, and staple down. Any excess fabric at the ends feel free to cut off the slits as you go.

Step 5: Once you've completed the stapling make sure to take care of any rough edges or additional fabric in the back by cutting the edges and making it more clean. (Even though this is going to be nailed down into the bar stool and you won't see it, you still want to have a nice, finished look!)
BAD EXAMPLE! This back needs to be cleaned up!

Well that's a little better..

PERFECT!

Step 6: Once you're all done stapling and cleaning up the back, flip your cushion over and admire your work! Happily install back on your bar stool, and enjoy the new look in your room! :)

TADA!!
BEFORE:

AFTER:

They're like brand new barstools!!!
No comments:
Post a Comment