I just recently did a Interior Design Job where I added Vintage Wall Decals to the Basement; I thought it would be a nice, unexpected surprise to a space that's usually on the "quieter" side for design. :) Below are my helpful hints in order to install wall decals easily and perfectly, every time!

Step 1: Clean the wall with a dry cloth to make sure there isn't any dust, or other particles on the wall that the decals may stick to.
Step 2: Measure the wall so that you know how you're going to lay out your decal design. You can also tape the decal sheets on the wall to give you a good idea of where you want to place them before installing them on the wall.

Step 3: Take your wall decal, and scratch over the entire surface of design with a credit card before peeling it. This will help it to adhere to the sticker side of the sheet. Once you've done this, slowly peel off the decal from it's original sheet, and make sure all parts of the design have transferred to the new sticky sheet portion of the decal.

Step 4: Once you've figured out where you want to start your decal design, place the sticky side of the wall decal to the wall, and use your hand to smooth out any ripples or bubbles.

Step 5: Again, use a credit card over the entire decal so that it adheres to the wall.

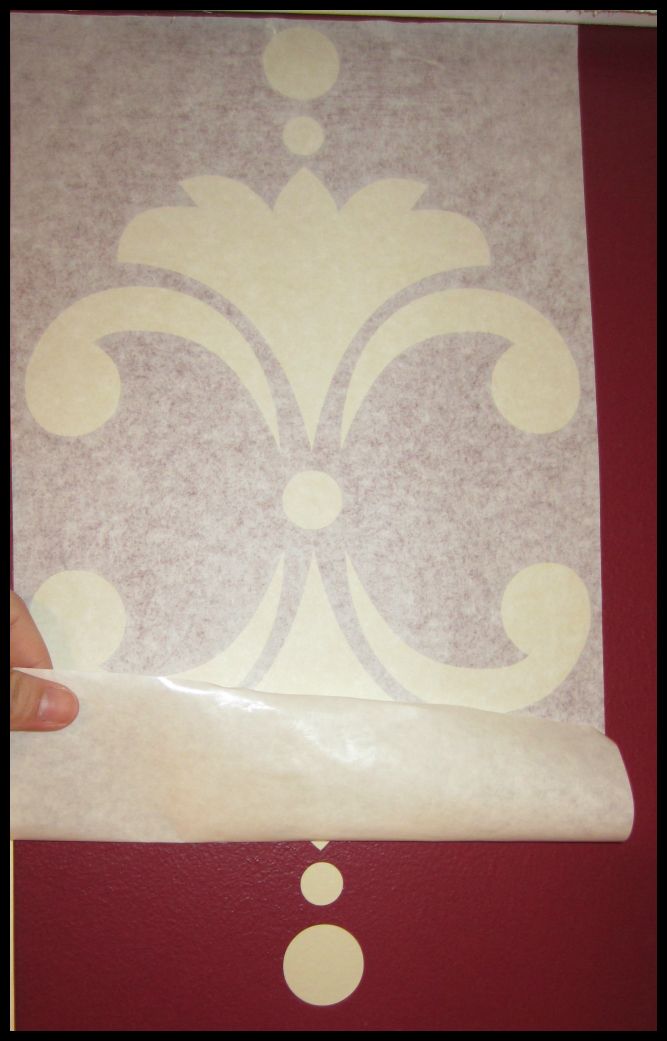
Step 6: After you have made sure that the decal is adhered to the wall, SLOWLY start to pull the decal sheet away from the wall. I personally like to start from the bottom, and start pulling up from one corner, then grab the other corner and do the same, almost like a wave or back and forth motion. I feel this allows you to fix any mistakes quickly, and will stop any tears from happening. This part takes patience! If you happen to notice some of your design stayed on the sticky sheet, simply put the sheet back on wall, and repeat the credit card scratching on the back of the wall decal sheet until the design comes off onto the wall.
Step 7: Once the decal is on the wall, Step back, and enjoy your new design!

**Few Side Notes when Installing**
One thing to make sure after the decal is installed is that none of the wall decal is bubbling/peeling off the wall when you've removed the sheet. If this happens simply take the back of your hand to smooth the wall decal back into place; This way it's not a lot of pressure, and you won't risk tearing the design.
Also, I like to put all my decals on the wall first and let them adhere for a bit before I take them off the wall; So I typically will only do one decal, remove the sheet, and use that as my guide for the placement of the rest of the decals.

Once they're all on the wall, I work on each decal one by one by taking off the decal sheet, and completing the entire installation.

Hope this gives you a little inspiration to add some drama to your rooms!

Thank you for sharing these tips & tricks!!!! I love putting decals on little things like mugs, glasses, and such, but this looks amazing!
ReplyDeleteThanks Curlyhaired Mama! I would have never thought to put decals on Mugs! What an awesome tip! Thanks!
ReplyDelete